Networked ATSC DVR
Some time ago, I bought a standalone ATSC tuner so that I could watch TV at my desk, without having to depend on the setup or state of any other “things” on my desk. Watching the news shouldn’t depend on the desk being in any particular configuration - say, if I’ve still got my work computer hooked up at 10pm, or am in the process of an OS reinstall on my laptop.
Enter the $29.95 bargain-basement ATSC tuner:
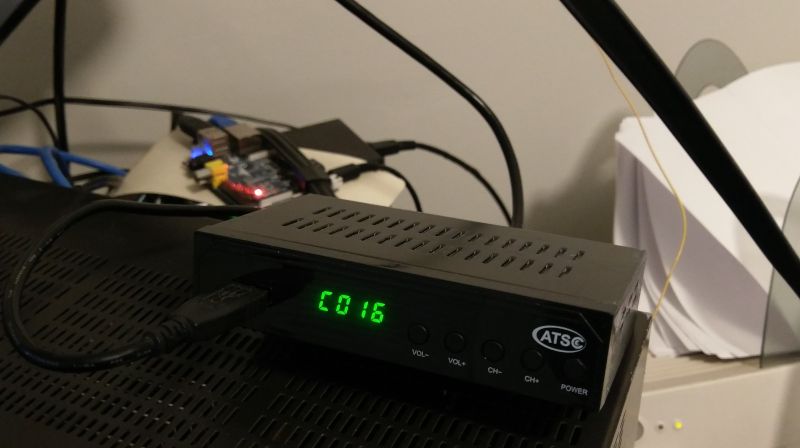
These can readily be had on eBay, though being fully generic, I can’t link a specific one. Mine doesn’t even have any brand markings on it. One feature they all do seem to have is the ability to plug in a USB device, for use as a DVR. Originally I plugged in a standard flash drive, until realizing that a flash drive was too slow to record some higher-bitrate channels (WBZ (CBS), for instance, can come in north of 16Mbps, while WBTS (NBC) can come in as low as 8Mbps). At that time, I switched to a portable spinning hard drive.
An upside to the removable media is that I can record something and take it into the living room later, attach it to my NAS and copy files from it, or even share a recording with friends. But this required manually shuttling around the drive, which likely not only reduced its lifespan, but also meant that no scheduled recording was possible while the drive was elsewhere.
I found myself asking if there was a way to get the tuner onto my network.
Solution
I did a perfunctory search for specs of the unit - it’s based around an older MSTAR chipset that lacks any meaningful documentation, and seems to only have 8MB of flash. It could be Linux-based, but sideloading extra hardware onto it was out of the question.
Instead, I decided to use the only interface it did give me: USB with UMS. Specifically:
- Hook up a hard drive to the SATA interface on a Banana Pi M1.
- Use the USB Mass Storage gadget kernel module, together with the Banana Pi’s USB OTG port, to “fake” a mass storage device.
- Run the “fake” mass storage device in loopback mode, mount it read-only, and share it via NFS.
Table of Contents
- Cabling
- Setting Up the Disk
- Setting Up Loopback
- Setting Up NFS
- Persisting Configuration Across Reboots
- Needed Workarounds
Cabling
This setup requires sufficient power to spin the disk. If I connected only the Banana Pi to a USB charger, like normal, the entire setup refused to run, and the disk exhibited a “click of death” as it tried to spin up. If I connected both a USB charger and the DVR, the disk had enough power to spin up. Your mileage may vary, and you may need a higher-output power supply to compensate. You may be able to get away with less power with a flash drive or SSD.
- Plug the “DC IN” jack on the Banana Pi into a USB charger.
- Plug the “USB OTG” jack on the Banana Pi into the DVR.
- Plug in the disk to the SATA jack. (While this works great with SATA, I later switched back to a USB enclosure - the steps are identical.)
- Plug in Ethernet.
I ended up having to brace the Pi between my stereo and a monitor arm, as the number of cables coming off it caused some significant tension.
Setting Up the Disk
First up, I formatted the disk as ext4 and mounted it read/write. This is the disk that will play host to the block file. It’s at /dev/sda1 in my case:
# mkdir /mnt/sda1
# mkfs.ext4 /dev/sda1
# mount -o nofail,noatime,nodiratime /dev/sda1 /mnt/sda1
For good measure, I also added an fstab entry to preserve this on reboot:
# cat /etc/fstab
/dev/mmcblk0p2 / ext4 defaults,noatime,nodiratime,commit=600,errors=remount-ro 0 1
tmpfs /tmp tmpfs defaults,nosuid 0 0
/dev/sda1 /mnt/sda1 ext4 defaults,nofail,noatime,nodiratime 0 0
Next, I made a file that was just shy of the 300GB available on the formatted drive, filled with zeroes. Adjust count based on the size of your drive.
# dd if=/dev/zero of=/mnt/sda1/block bs=1M count=300000
It turns out that this tuner is very picky about what drives it will read. I had to create a partition table under Linux, but let the tuner format the partition. I used fdisk to write an MBR and create a single, large FAT32 partition, the end result of which was:
# fdisk -lu /mnt/sda1/block
Disk /mnt/sda1/block: 293.3 GiB, 314961686528 bytes, 615159544 sectors
Units: sectors of 1 * 512 = 512 bytes
Sector size (logical/physical): 512 bytes / 512 bytes
I/O size (minimum/optimal): 512 bytes / 512 bytes
Disklabel type: dos
Disk identifier: 0x00000000

Device           Boot Start       End   Sectors   Size Id Type
/mnt/sda1/block1         63 615159543 615159481 293.3G  b W95 FAT32
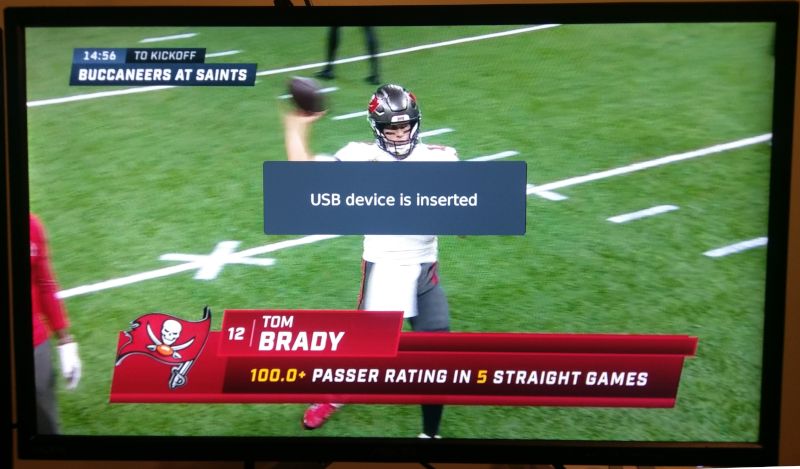
I then loaded the g_mass_storage kernel module, pointed at that file:
# modprobe g_mass_storage file=/mnt/sda1/block
At this point, the tuner should recognize that a USB drive has been inserted!
Use the menu to go to USB Configuration -> PVR Configuration -> Format, and format as FAT32:
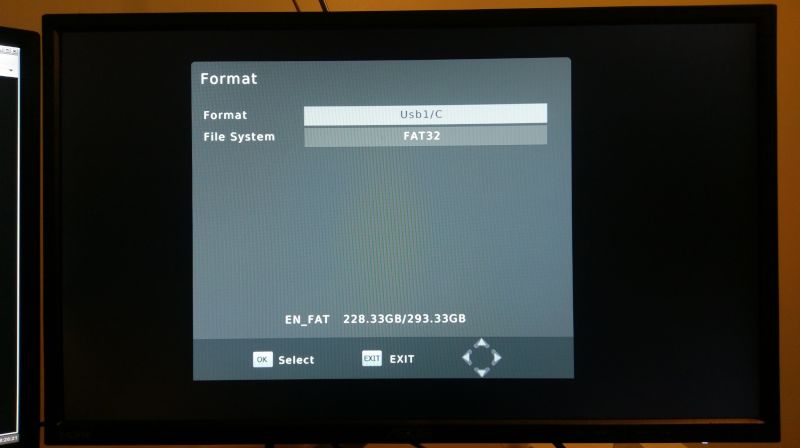
The DVR should now record and play back, as it does normally, except all of the data will be going to the fake block device on the Banana Pi via UMS.
Setting Up Loopback
Now that UMS is configured, the next step is configuring a loopback device so that Linux can read files off the disk. After some trial and error, I arrived at:
# losetup -P /dev/loop0 /mnt/sda1/block
…where -P instructs losetup to look for and parse a partition table, if one exists. This creates the device /dev/loop0 and /dev/loop0p1, instead of just the former (which is not a mountable file system).
Next, mount the device read-only as FAT. It’s critical that the device be mounted read-only: the DVR is already writing to it, and attempts to write from both Linux and the DVR will corrupt the filesystem. I also added the sync option to (hopefully) disable some forms of read caching, since the DVR is writing without Linux knowing, but I don’t know that it has an effect (see the later sections for more info).
# mkdir /mnt/ums
# mount -t vfat -o ro,sync /dev/loop0p1 /mnt/ums
Recordings should now be visible to Linux. Unfortunately, the tuner does not store the date, so all files are dated January 1st, 1980. Datestamps in the filenames help here.
# ls -l /mnt/ums/HBPVR
total 17864
-rwxr-xr-x 1 root root        0 Jan  1  1980 MM_PLAY_TIME.ini
-rwxr-xr-x 1 root root 18284544 Jan  1  1980 WFXT-12302020-1654.mts
-rwxr-xr-x 1 root root     6144 Jan  1  1980 WFXT-12302020-1654.mts.meta
Setting up NFS
Now that Linux can see recordings, export the mounted filesystem. The * exports to all hosts (I am relying on NAT to keep NFS inside my network), while all_squash allows any user to connect. As the mount is ro, and the only source is public TV broadcasts, the security implications seem fairly minimal.
# cat /etc/exports
/mnt/ums *(ro,all_squash,no_subtree_check)
Install an NFS server (I’m using Armbian - adjust as necessary for your operating system. It should be the same for Debian derivatives.):
# apt-get install nfs-kernel-server
A networked machine should now be able to mount NFS:
[don@zeus ~] sudo mount -t nfs 192.168.1.12:/mnt/ums ums
[don@zeus ~] ls ums/HBPVR
total 17864
-rwxr-xr-x 1 root root        0 Jan  1  1980 MM_PLAY_TIME.ini
-rwxr-xr-x 1 root root 18284544 Jan  1  1980 WFXT-12302020-1654.mts
-rwxr-xr-x 1 root root     6144 Jan  1  1980 WFXT-12302020-1654.mts.meta
Persisting Configuration Across Reboots
While /etc/fstab and /etc/exports won’t change across reboots, there’s a gotcha: adding the g_mass_storage module requires the filesystem to be mounted, but modules loaded from /etc/modprobe.d are initialized beore /etc/fstab is parsed and mounts are mounted. My solution instead was to let systemd take care of this once the system has reached multiuser mode. For consistency’s sake, I use the same script to initialize the loopback device.
# cat /lib/systemd/system/ums.service
[Unit]
Description=Setup UMS, loopback, and NFS for DVR
After=network.target

[Service]
Type=oneshot
ExecStart=/sbin/modprobe g_mass_storage file=/mnt/sda1/block
ExecStart=/sbin/losetup -P /dev/loop0 /mnt/sda1/block
ExecStart=/bin/mount -t vfat -o ro,sync /dev/loop0p1 /mnt/ums
ExecStart=/usr/sbin/exportfs -ra

[Install]
WantedBy=multi-user.target
To install, place the above file and run:
# systemctl daemon-reload
systemctl enable ums
Created symlink /etc/systemd/system/multi-user.target.wants/ums.service -> /lib/systemd/system/ums.service.
Needed Workarounds
There are two big gotchas. Linux does not like to be sharing a volume with another device - disk caches more or less stop working as expected. Second, the Banana Pi’s Ethernet interface seems to have an issue being disconnected for long periods of time.
Disk Caching
Linux appears to cache the FAT in the kernel page cache, and individual entries in the FAT in the dentry cache. As a result:
- Without clearing the page cache, new files never show up, even when you’ve hit Record.
- Without clearing the dentry cache, files stay the size that they were first “seen” at, even as they’re being written.
Since the Banana Pi does nothing but serve files synchronously off the disk, I chose to flush both caches every 60 seconds using a cron task, as it appears impossible to turn them off entirely. There’s a performance penalty to doing this, but slower performance is acceptable in the name of having “correct” data.
# cat /etc/cron.d/cache_dropper
* * * * * root echo 3 > /proc/sys/vm/drop_caches
Ethernet PHY bug
When I hit the power switch on my desk, the Banana Pi and DVR stay powered up (so that they can record on a schedule), but my Ethernet switch loses power. If the Banana Pi is disconnected for an extended period of time, this error gets thrown by the kernel, and the network stops working, even when the switch regains power:
Jan 17 01:50:34 localhost kernel: [146717.142961] Generic PHY stmmac-0:00: Master/Slave resolution failed
Jan 17 01:50:34 localhost kernel: [146717.142997] ------------[ cut here ]------------
Jan 17 01:50:34 localhost kernel: [146717.143098] WARNING: CPU: 1 PID: 10033 at /media/mikey/BPI-4TB-C/gitlab/build/bpi-kernel-5/linux-5.1.1/drivers/net/phy/phy.c:714 phy_error+0x1f/0x4c
Jan 17 01:50:34 localhost kernel: [146717.143116] Modules linked in: rpcsec_gss_krb5 g_mass_storage usb_f_mass_storage libcomposite sun4i_gpadc_iio sun4i_codec snd_soc_core snd_pcm_dmaengine sun4i_ts snd_pcm sun4i_gpadc snd_timer nvmem_sunxi_sid joydev snd soundcore uas sunxi_cir input_leds evdev sunxi_cedrus(C) v4l2_mem2mem videobuf2_dma_contig videobuf2_memops videobuf2_v4l2 sun4i_ss videobuf2_common uio_pdrv_genirq uio ip_tables x_tables
Jan 17 01:50:34 localhost kernel: [146717.143479] CPU: 1 PID: 10033 Comm: kworker/1:2 Tainted: G         C        5.1.1-BPI-Kernel #1
Jan 17 01:50:34 localhost kernel: [146717.143501] Hardware name: Allwinner sun7i (A20) Family
Jan 17 01:50:34 localhost kernel: [146717.143562] Workqueue: events_power_efficient phy_state_machine
Jan 17 01:50:34 localhost kernel: [146717.143674] [<c010d601>] (unwind_backtrace) from [<c010a275>] (show_stack+0x11/0x14)
Jan 17 01:50:34 localhost kernel: [146717.143746] [<c010a275>] (show_stack) from [<c08fac69>] (dump_stack+0x69/0x78)
Jan 17 01:50:34 localhost kernel: [146717.143819] [<c08fac69>] (dump_stack) from [<c011ae11>] (__warn+0xa1/0xb4)
Jan 17 01:50:34 localhost kernel: [146717.143894] [<c011ae11>] (__warn) from [<c011aeeb>] (warn_slowpath_null+0x2f/0x34)
Jan 17 01:50:34 localhost kernel: [146717.143968] [<c011aeeb>] (warn_slowpath_null) from [<c06f7fbb>] (phy_error+0x1f/0x4c)
Jan 17 01:50:34 localhost kernel: [146717.144048] [<c06f7fbb>] (phy_error) from [<c06f8c1d>] (phy_state_machine+0x55/0x148)
Jan 17 01:50:34 localhost kernel: [146717.144135] [<c06f8c1d>] (phy_state_machine) from [<c012e8df>] (process_one_work+0x167/0x388)
Jan 17 01:50:34 localhost kernel: [146717.144214] [<c012e8df>] (process_one_work) from [<c012f47b>] (worker_thread+0xfb/0x3fc)
Jan 17 01:50:34 localhost kernel: [146717.144286] [<c012f47b>] (worker_thread) from [<c0132e5d>] (kthread+0xf9/0x100)
Jan 17 01:50:34 localhost kernel: [146717.144350] [<c0132e5d>] (kthread) from [<c01010f9>] (ret_from_fork+0x11/0x38)
Jan 17 01:50:34 localhost kernel: [146717.144379] Exception stack(0xed8a9fb0 to 0xed8a9ff8)
Jan 17 01:50:34 localhost kernel: [146717.144424] 9fa0:                                     00000000 00000000 00000000 00000000
Jan 17 01:50:34 localhost kernel: [146717.144482] 9fc0: 00000000 00000000 00000000 00000000 00000000 00000000 00000000 00000000
Jan 17 01:50:34 localhost kernel: [146717.144529] 9fe0: 00000000 00000000 00000000 00000000 00000013 00000000
Jan 17 01:50:34 localhost kernel: [146717.144560] ---[ end trace da807a8fecd825d3 ]---
I chose to get around this by stopping and starting the interface if this is detected, and the interface hasn’t re-posted a status - again using a minutely cron:
# cat /etc/cron.d/reset_eth0
* * * * * root /usr/local/bin/reset_eth0.sh
# cat /usr/local/bin/reset_eth0.sh
#!/bin/bash -euo pipefail

most_recent_message=$(grep -E '(Link is|resolution failed)' /var/log/kern.log | tail -n 1)

if [[ $most_recent_message =~ "resolution failed" ]]; then
  ip link set eth0 down
  sleep 5
  ip link set eth0 up
fi